Your One-Stop Shop for Engineering, Electromechanical & Construction Tools
Your One-Stop Shop for Engineering, Electromechanical & Construction Tools
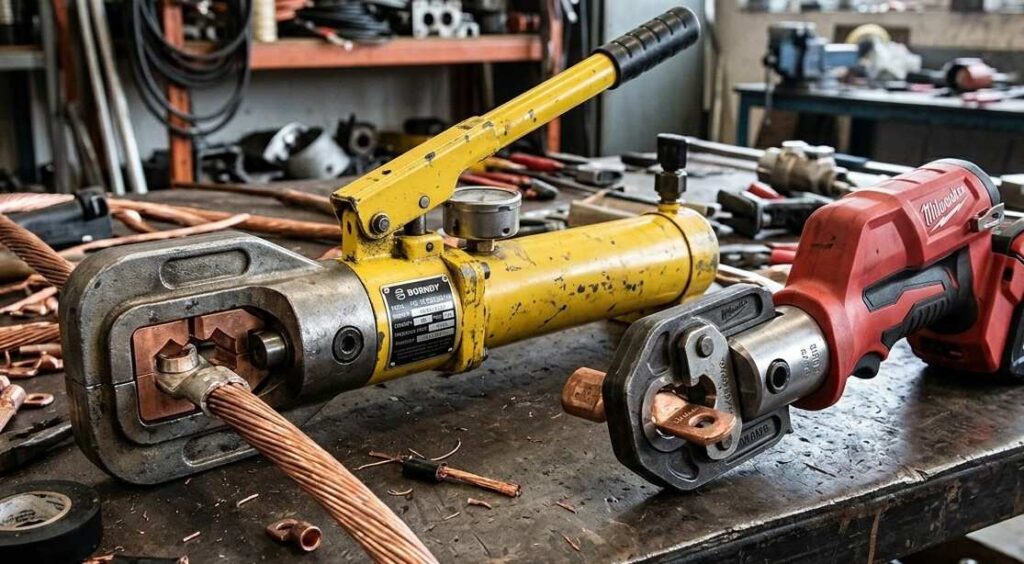
Hydraulic crimping tools are trusted across electrical, construction, and industrial work because they create permanent, low resistance connections that hold under load.
Whether you terminate large copper lugs or join control cables, the right tool and technique decide whether a joint stays tight for years.
This guide explains how these tools work, how to use them safely, and how to choose one that matches your daily workload.
A hydraulic crimping tool uses fluid pressure to compress a metal connector, lug, or ferrule onto a conductor. When you pump the handle or trigger the pump, a piston drives hydraulic fluid that multiplies your input force into several tons of compression at the die.
The result is a uniform, gas tight joint that resists vibration, pull out, and heat far better than a soldered or hand pressed connection.
These tools range from compact handheld units for field termination to battery and electric powered models built for high volume production.
Across every size the principle stays the same. Liquids do not compress, so the force you apply transfers evenly to the crimp head and gives the same result on the first joint and the hundredth.
Knowing the parts helps you operate and maintain the tool with confidence.
You select and lock the correct die pair into the head, place the connector and stripped conductor between the dies, then build pressure by pumping.
As the dies close, they deform the connector around the conductor until full compression is reached. Many tools include a relief valve that clicks or stops when the preset force is met, which removes guesswork and keeps every crimp consistent.
Match the tool to your conductor range, crimp volume, and working environment. For occasional terminations on medium conductors, a handheld manual unit is enough. For continuous shop or site work on large cables, a battery or electric pump model saves time and effort. Always confirm tonnage, die compatibility, and the conductor sizes the tool is rated for before buying.
Sourcing also matters for quality and traceability. Working with a dependable hydraulic crimping tools supplier ensures you receive genuine dies, accurate force ratings, and proper after sales support, which protects the integrity of every connection you make.
The table below shows where each tool performs best.
| Feature | Manual Crimpers | Hydraulic Crimping Tools |
|---|---|---|
| Force Output | Limited to hand strength | High, multiplied by hydraulic pressure |
| Conductor Size | Small to medium | Medium to large heavy duty |
| Effort During Use | Tiring on repeat work | Low effort once set up |
| Crimp Consistency | Varies by operator | Uniform and repeatable |
| Best For | Light field and panel work | High volume and large terminations |
For demanding projects where crimp quality is checked against safety standards, hydraulic tools are the clear choice.
If you’re still deciding which option best suits your application, explore our detailed guide on Manual vs Hydraulic Crimping Tools to compare their features, advantages, limitations, and ideal use cases.
Follow this sequence every time for professional, safe, and reliable crimping results.
Prepare the hydraulic crimping tool, conductor, correctly sized connector, measuring tape, cable cutter, and appropriate personal protective equipment (gloves and safety goggles) before starting the job.
Cut the conductor cleanly and strip enough insulation so the bare conductor fits completely inside the connector without any exposed strands protruding.
Choose the die that matches both the conductor and connector size. Using the correct die ensures a secure, accurate, and standards-compliant crimp.
Insert the matching die set into the crimping head, align them properly, and ensure they are securely locked to prevent movement during crimping.
Place the connector in the die and verify that the conductor is fully inserted and correctly aligned before applying pressure.
Operate the hydraulic pump with smooth, steady strokes until full compression is achieved or the pressure relief valve activates. Avoid incomplete or uneven pumping.
Open the release valve to retract the tool, remove the crimped connector, and inspect the crimp for proper compression, alignment, and any visible defects.
Perform a firm pull test to confirm the connector is securely attached. If it loosens or slides, cut it off and repeat the crimp using the correct die and alignment.
Use this quick checklist to inspect every crimped connection and ensure it is secure, reliable, and free from defects before putting it into service.
| Check | What a Good Crimp Shows | Warning Sign |
|---|---|---|
| Shape | Even, flat compression | Uneven or partial bite |
| Surface | No cracks or sharp splits | Hairline cracks |
| Conductor | Strands intact and seated | Strands extruding or loose |
| Pull Test | Holds firm under hand force | Connector slips |
If any warning sign appears, the joint should be cut off and redone rather than left in service, since a weak crimp can overheat and fail under load.
Safe operation and routine care keep the tool accurate and extend its service life.
A hydraulic crimping tool rewards good technique with connections that stay secure season after season. By selecting the correct die, applying steady pressure, inspecting every crimp, and maintaining the tool properly, you achieve professional, code aligned results on electrical and industrial work alike.
For genuine crimping tools, expert product guidance, and dependable supply support, trust Al Sakeena Building Materials and Electricals Trading. Visit our website or contact our technical sales team today for the right hydraulic crimping tool for your specific application.
Discover guides on all hardware, building materials, and electrical products for your next project.