Your One-Stop Shop for Engineering, Electromechanical & Construction Tools


Your One-Stop Shop for Engineering, Electromechanical & Construction Tools
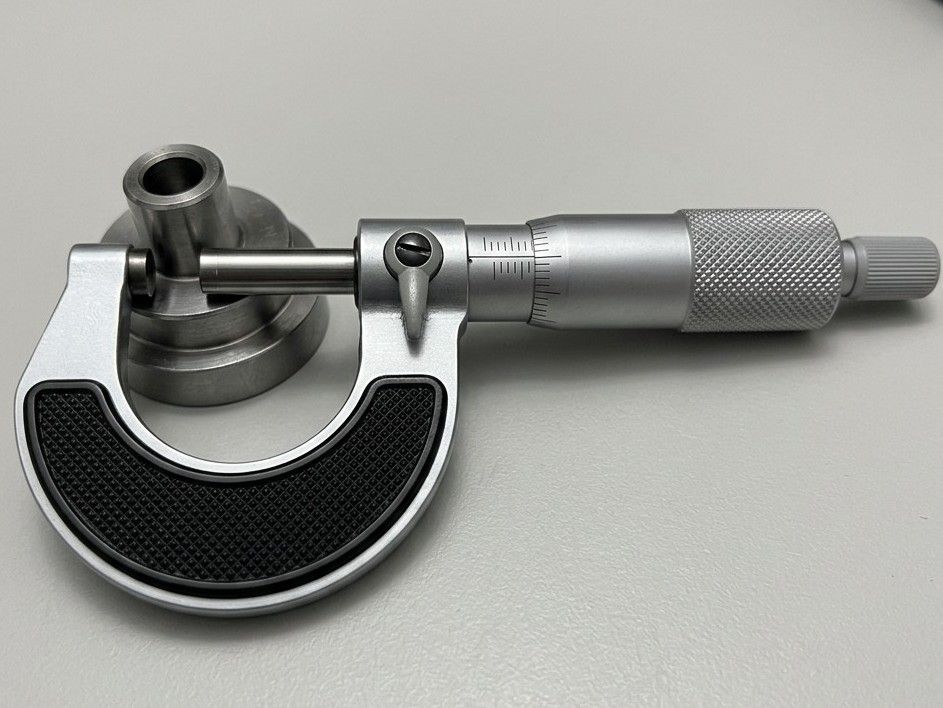
A Mitutoyo micrometer is one of the most trusted tools in any workshop or quality control lab. It can measure down to a fraction of a millimeter, but that precision only shows up when the tool is used the right way. Many operators assume the instrument alone guarantees accuracy. In reality, technique plays a bigger role than most people realize.
This guide walks you through the correct way to use a Mitutoyo micrometer, from the checks you should do before measuring to the common mistakes that quietly ruin readings.
Most measurement errors do not come from a faulty micrometer. They come from how it is handled.
Two operators measuring the same part can record different values simply because one tightened the spindle by feel while the other used the ratchet stop. Mitutoyo designs its micrometers with a constant force mechanism for exactly this reason.
When you skip it and rely on your grip instead, the applied pressure changes every time, and so does the reading. Consistency in force is what separates a reliable measurement from a guess. It is also one of the reasons Mitutoyo instruments hold up well over years of daily use, a point covered in more depth in What Makes Mitutoyo Lead Other Measuring Brands.
A few simple habits at the start of a measuring session can prevent most errors later.
These steps take less than a minute. They save far more time than re measuring a batch of rejected parts.
This workflow applies to most mechanical and digital outside micrometers.
Step 1: Hold the Micrometer Correctly
Hold the frame with a stable grip. Avoid squeezing too hard, since hand heat can influence precision on tight tolerance work.
Step 2: Position the Part Squarely
Place the part between the anvil and spindle so the faces contact squarely, not at an angle. Angled contact creates measurement error.
Step 3: Close Using the Ratchet or Friction Thimble
Turn the thimble until it is nearly closed, then use the ratchet to apply consistent measuring force. Mitutoyo recommends always using the ratchet stop to keep force consistent across operators.
Step 4: Take the Reading
On a mechanical micrometer, read the sleeve first, then the thimble, and add the vernier if your model has one. On a digital micrometer, confirm the units and resolution first, then record the stable reading once it settles.
Step 5: Repeat for Confidence
For critical parts, measure the same feature two to three times, slightly repositioning between each attempt, and confirm the readings match.
The table below summarizes the entire process in one place.
| Stage | What to Do | Why It Matters |
|---|---|---|
| Before Measuring | Clean faces and let temperature stabilize | Prevents false readings from debris or expansion |
| Force Control | Use the ratchet or friction thimble | Keeps measuring force consistent across operators |
| Zero Check | Verify the zero point regularly | Catches drift before it affects results |
| Reading | Read sleeve then thimble, add vernier if present | Avoids simple reading mistakes |
| Verification | Re measure the same feature | Confirms setup and alignment are correct |
Checking zero is something that should happen at the start of every session, not just once a week. Bring the faces together using the ratchet, in a slow and controlled motion, and confirm the reading matches zero.
If the zero point keeps shifting even after cleaning, do not keep forcing adjustments. Inspect the faces for wear or damage first. If the issue continues, the micrometer likely needs professional calibration rather than a manual fix.
A trusted Mitutoyo supplier in UAE can also help with calibration support. Our guide on Top Calibration Errors in Mitutoyo Measurement Methods breaks down where accuracy tends to break down and how to avoid the same mistakes.
Even experienced operators fall into a few habits that hurt precision over time.
If you regularly switch between micrometers and other precision tools, it also helps to understand handling basics for instruments like dial indicators. Browse our range of Mitutoyo Dial Indicator Dubai UAE options to see models suited to alignment and runout checks.
Even perfect technique will not help if the tool itself is not suited to the job. Before buying, think through what you actually need to measure and how often.
| Factor | What to Look For |
|---|---|
| Measuring Range | Common ranges include 0 to 25 mm and 25 to 50 mm |
| Resolution | Digital models often offer 0.001 mm resolution |
| Force Mechanism | Ratchet stop or friction thimble for consistency |
| Environment | Coolant-proof models for harsh shop floors |
Getting this right from the start avoids the frustration of a tool that cannot handle your daily workload.
If your work also involves quick outside or depth checks alongside micrometer readings, it is worth looking at our Mitutoyo Vernier Calipers UAE range as a complementary tool for general dimensional inspection.
For a wider selection of gauges, indicators, and hand tools that pair well with a micrometer on the shop floor, explore our full Mitutoyo Precision Tools UAE collection.
A good Mitutoyo supplier in UAE can walk you through these specifications based on your actual production needs rather than just selling you the most popular model.
Getting perfect measurements from a Mitutoyo micrometer really comes down to discipline, not luck. Clean measuring faces, controlled force through the ratchet or friction thimble, regular zero checks, and a habit of confirming repeatability will keep your readings accurate across every operator and every shift.
Whether you’re equipping a manufacturing floor, an inspection lab, or a small workshop, working with a licensed Mitutoyo supplier helps you get genuine instruments, proper guidance on model selection, and support long after the purchase is made.
Contact ASBMET Al Sakeena tools supplier Dubai today for genuine Mitutoyo micrometers, expert technical guidance, calibration support, and reliable solutions tailored to your industrial measurement requirements.